


Getting Started with the Stem Separator Plugin
LALAL.AI Stem Separator is a plugin for your DAW that works in real time or offline. Insert it on a track or bus, and it isolates or removes seven stems: vocals, drums, piano, acoustic guitar, electric guitar, bass, and a full instrumental, derived by isolating vocals.
It runs on Lyra, LALAL.AI’s own model built specifically for on-device processing, so the stem separation happens locally: no upload, no server queue, no internet connection needed for the audio itself, and nothing about your audio ever leaves your computer. The plugin also doesn’t touch your minutes balance, which is only deducted by cloud-based processing: on the web, in the mobile app, or in the desktop app outside Local mode.
Turn on the stems you want to isolate, decide whether to hear just those stems or everything else instead, and, when working in real time, adjust latency to match what your system can handle. The plugin also works offline as part of your DAW’s Bounce or Render (more on that below). Activation happens once per device through your account email and requires an active Pro subscription. From there, everything runs entirely inside your DAW.
What You’re Working With
Before installing anything, here’s what the plugin’s controls actually do.
Real-time and offline are two ways the plugin processes audio. You don’t choose between them directly. Instead, your DAW does, depending on how you use the plugin:
- Real-time — running while you play back live and want to hear each change immediately as you toggle stems or switch Output Mode. This is what Latency, below, is for.
- Offline — running when your DAW renders the track without live playback, for instance, a Bounce, Render, Freeze, or Export. There’s no live playback to keep pace with, so the plugin processes the whole selection in one pass and hands you back a finished file.
Both stay entirely on your device, on the same Lyra model. Offline here means “not synced to live playback,” not “no internet connection.” It’s a different thing from the web version’s cloud models.
The stems you can turn on:
- Vocals
- Drums
- Piano
- Acoustic Guitar
- Electric Guitar
- Bass
Enable any combination of these at once.
Output Mode decides what you actually hear:
- Selected Stems — only the parts you turned on
- Rest of Mix — everything except the parts you turned on, the residual
There’s no dedicated Instrumental control, but turning on only Vocals and setting Output Mode to Rest of Mix gives you the residual, a full instrumental, since that’s everything left once the vocal is taken out.
Latency is a trade-off, not a set-once setting:
- Lower latency — reacts faster, asks more of your processor
- Higher latency — more stable, reacts more slowly
- Calibrate — runs a quick benchmark and sets latency to a stable starting point for you, rather than dialing it in by trial and error
Activation ties the plugin to your device:
- An active Pro subscription is required, there’s no free version or trial
- A one-time setup using your account email and a code sent to your inbox
- Internet access needed the first time, and periodically afterward for a background refresh
The plugin format depends on your platform:
- Windows — VST3
- macOS — VST3 or AU
- Linux — VST3
Works with most major DAWs:
- Any DAW that supports VST3, or AU on macOS, should work
- Tested directly in Ableton Live, Cockos REAPER, Steinberg Cubase, and VST3-enabled versions of Audacity
Messages you might see while it works:
- “Preparing...” — loading, about to be ready
- “Overload Warning” — asking more of your system than it can handle right now
- “Failed to Initialize Plugin” — something went wrong on startup
Installing the Plugin: Step by Step
How you install the plugin depends on your operating system.
Windows
- Download and launch the installer. Go to the LALAL.AI Stem Separator page to get the installer, then run it.
- Choose your VST3 folder. Keep the default or point it to a custom location.
The default is C:\Program Files\Common Files\VST3\, and installing there may prompt for administrator permission. Choosing a custom folder during setup avoids that.
- Let the installer finish. There’s nothing else to configure at this point, just let it complete.
- Restart your DAW. Most DAWs only scan for new plugins on startup, so this is what lets it find the new install.
- Rescan if needed. If the plugin doesn’t appear right away, run a plugin rescan (more on this below).
MacOS
- Download the installer and open it. Go to the LALAL.AI Stem Separator page for the DMG, open it, and run the PKG installer inside.
- Choose which formats to install. Pick whichever your DAW actually uses, VST3, AU, or both.
- Finish the install. This places the plugin in the standard system locations, /Library/Audio/Plug-Ins/VST3/ for VST3 and /Library/Audio/Plug-Ins/Components/ for AU.
- Restart your DAW. Most DAWs only scan for new plugins on startup, so this is what lets it find the new install.
- Rescan if needed. If it doesn’t appear automatically, run a plugin rescan.
Linux
There’s no installer wizard here, you place the plugin yourself.
- Download and extract the plugin archive. Go to the LALAL.AI Stem Separator page to get it, then extract it to get a Stem Separator.vst3 bundle.
- Copy it into a VST3 folder your DAW scans. Start with ~/.vst3/ in your home directory, no root access needed. System folders like /usr/lib/vst3/ or /usr/local/lib/vst3/ only matter if your DAW scans exclusively system locations.
- Keep permissions intact. Make sure the copied files retain their executable and read permissions; Linux installs are more sensitive to this than the other platforms.
- Restart your DAW. Most DAWs only scan for new plugins on startup, so this is what lets it find the new install.
- Rescan and confirm the path. Double-check that the folder you copied into is listed in your DAW’s VST3 scan paths.
If Your DAW Doesn’t See the Plugin
Most DAWs scan their default VST3/AU folders automatically on startup, so this usually isn’t necessary. If it is:
- Make sure your DAW is updated to its latest version; older versions can have trouble picking up newly installed plugins.
- Open your DAW’s plugin preferences.
- Confirm the folder you installed into is in the scan list.
- Run a full plugin rescan.
- Restart the DAW once more to finish loading the plugin it just found.
On Linux specifically, the most likely culprit is either the exact path you copied to or the file permissions.
Activating the Plugin: Step by Step
The first time you open the plugin in a project, you’ll see an activation screen instead of the usual controls. It only happens once per device.
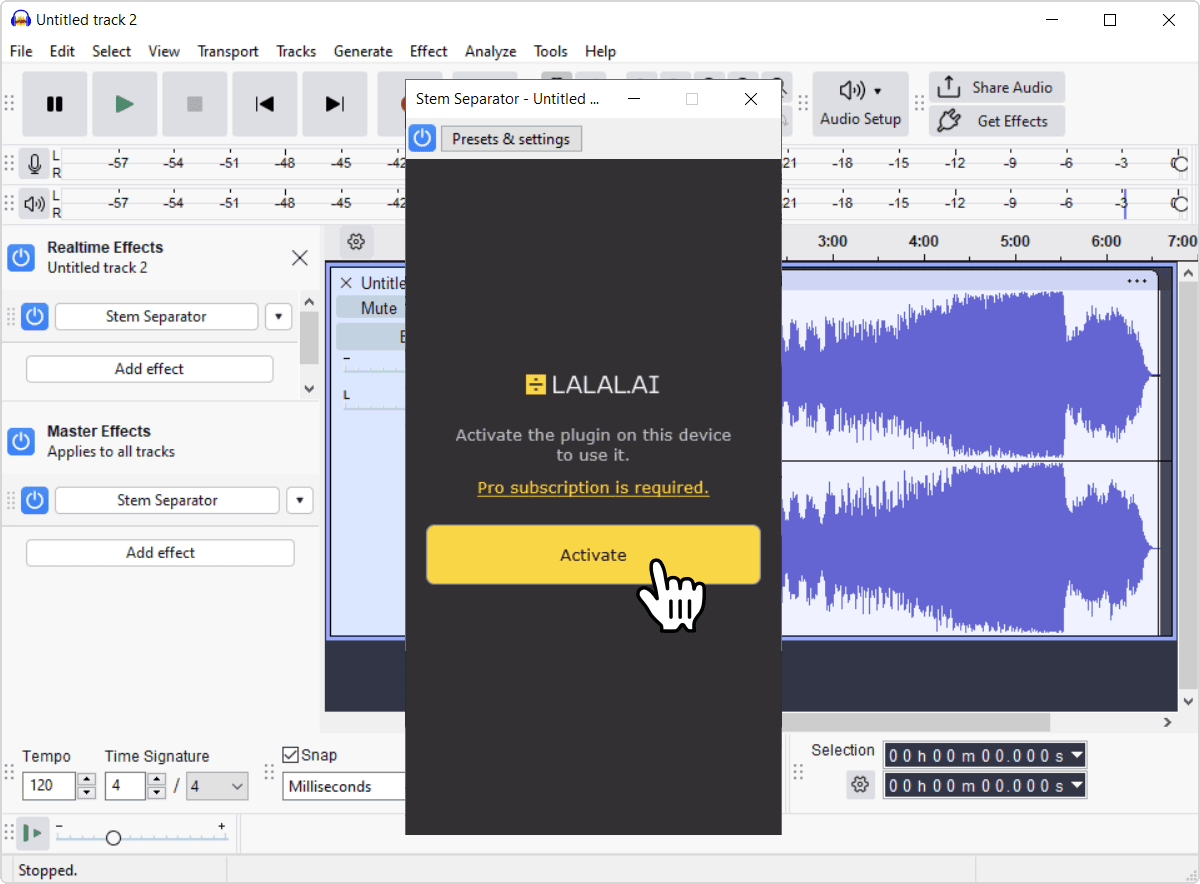
- Start the activation process. Click the Activate button.
![Activate button on the plugin activation screen]()
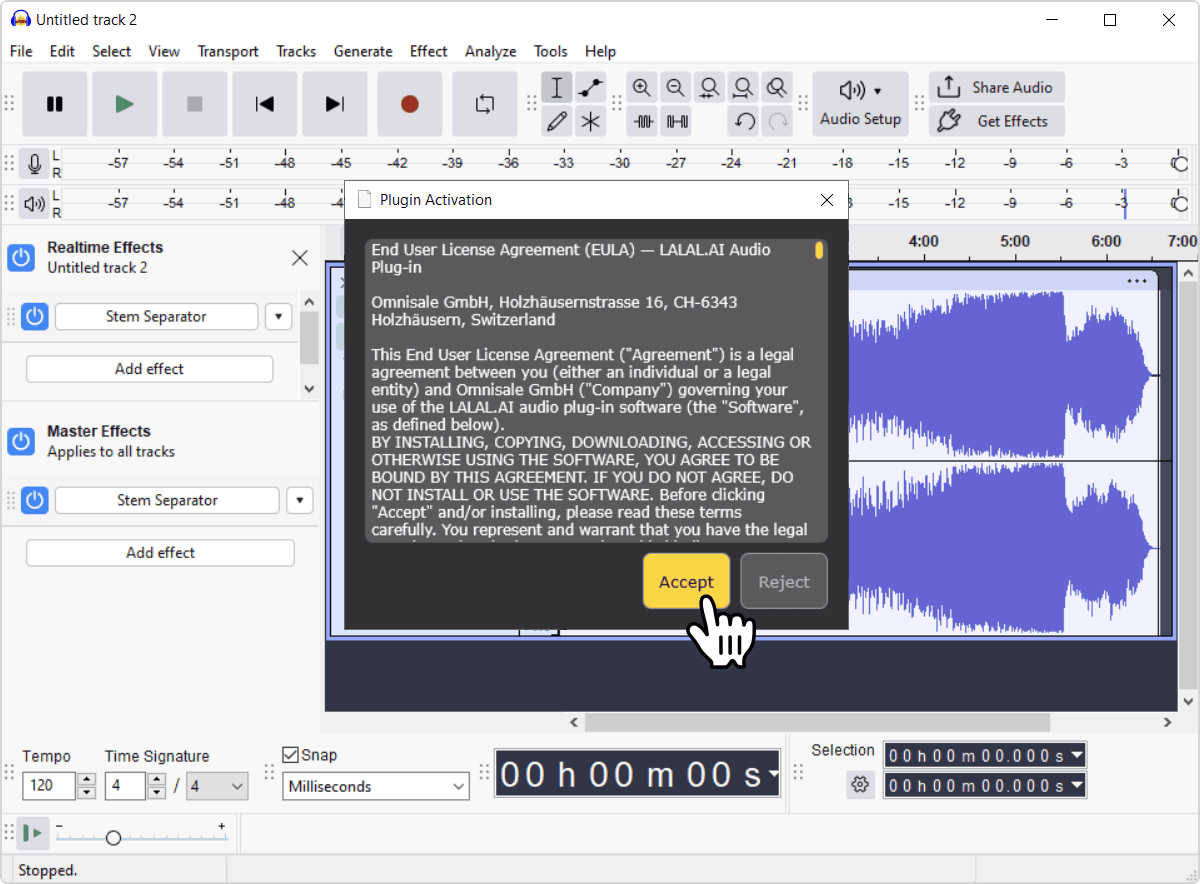
- Review the EULA, and click ‘Accept’ if you agree. EULA stands for end-user license agreement. It covers the terms for using the plugin.
![End-user license agreement shown inside the plugin]()
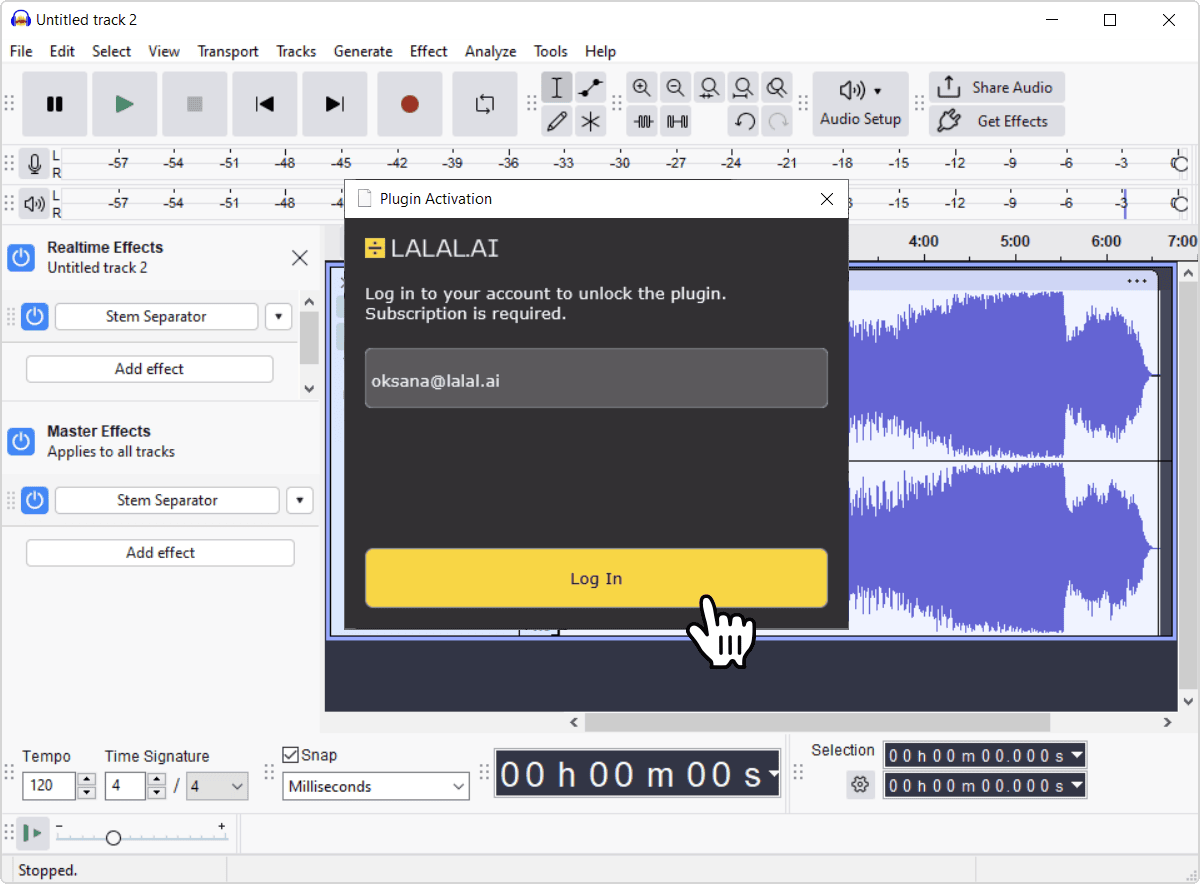
- Log in to your account. Enter the email for your LALAL.AI account, the same one your Pro subscription is tied to. Click Log In.
![Email field and Log In button on the plugin activation screen]()
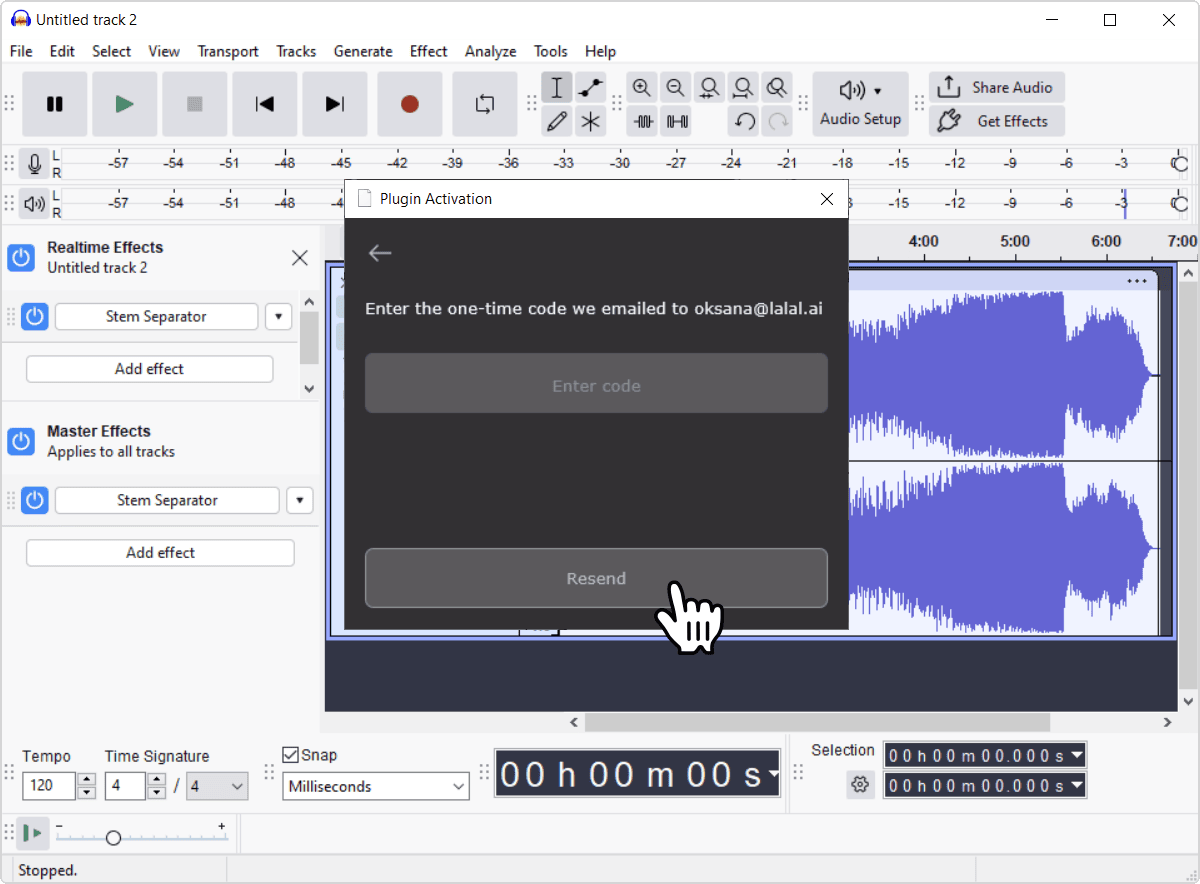
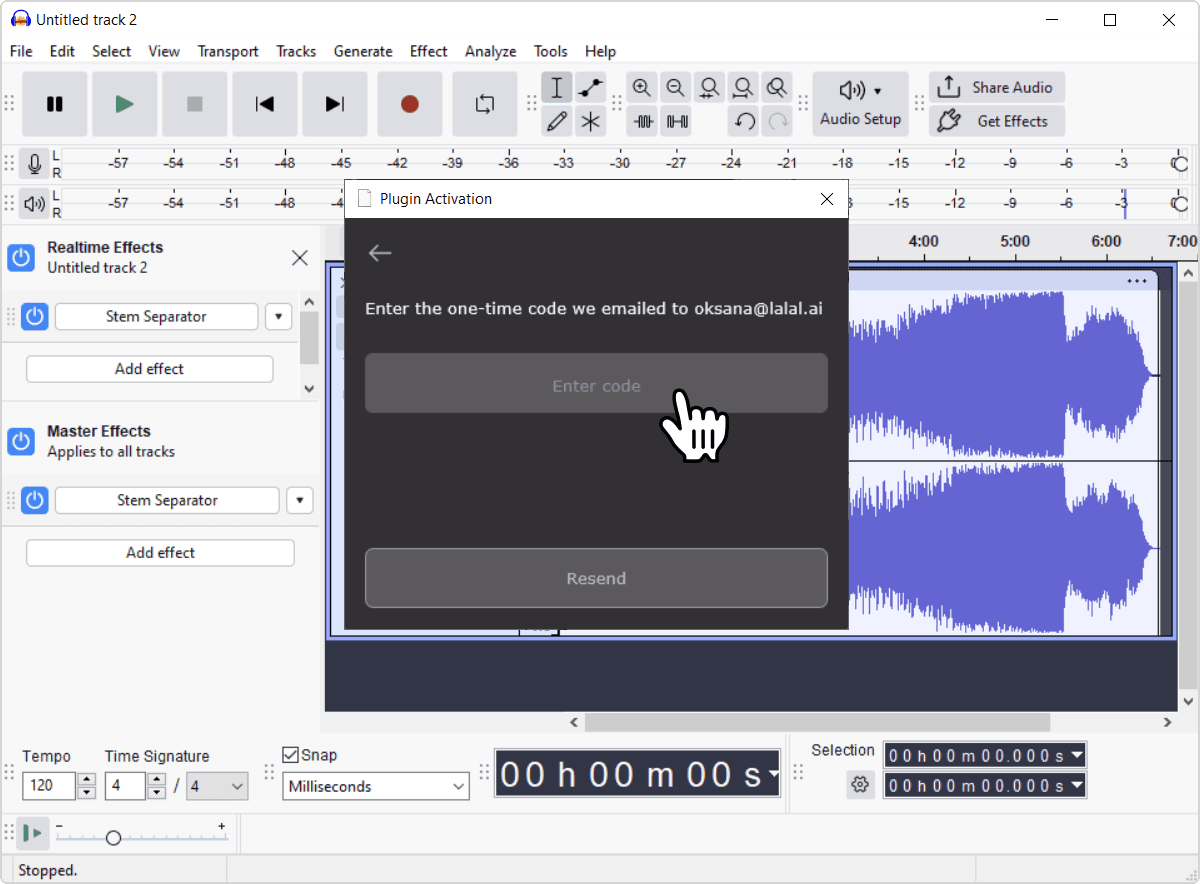
- Check your inbox for a one-time code. If it hasn’t arrived after a few minutes, check your spam folder and confirm you typed your email correctly. You can also retry sending the code from the code entry screen instead of starting over.
![Resend button on the code entry screen]()
- Enter the 6-digit code into the plugin. This is the code that was just emailed to you.
![Code entry field inside the plugin]()
- Wait for verification. Once the code is verified, the activation screen closes, and the plugin is ready to use.
![Plugin verifying the activation code]()
Good to Know
- Activation is saved locally and tied to that specific device.
- The plugin periodically refreshes activation in the background, which needs internet access to succeed.
- If that refresh ever fails because the saved activation looks invalid or expired, you may be asked to activate again.
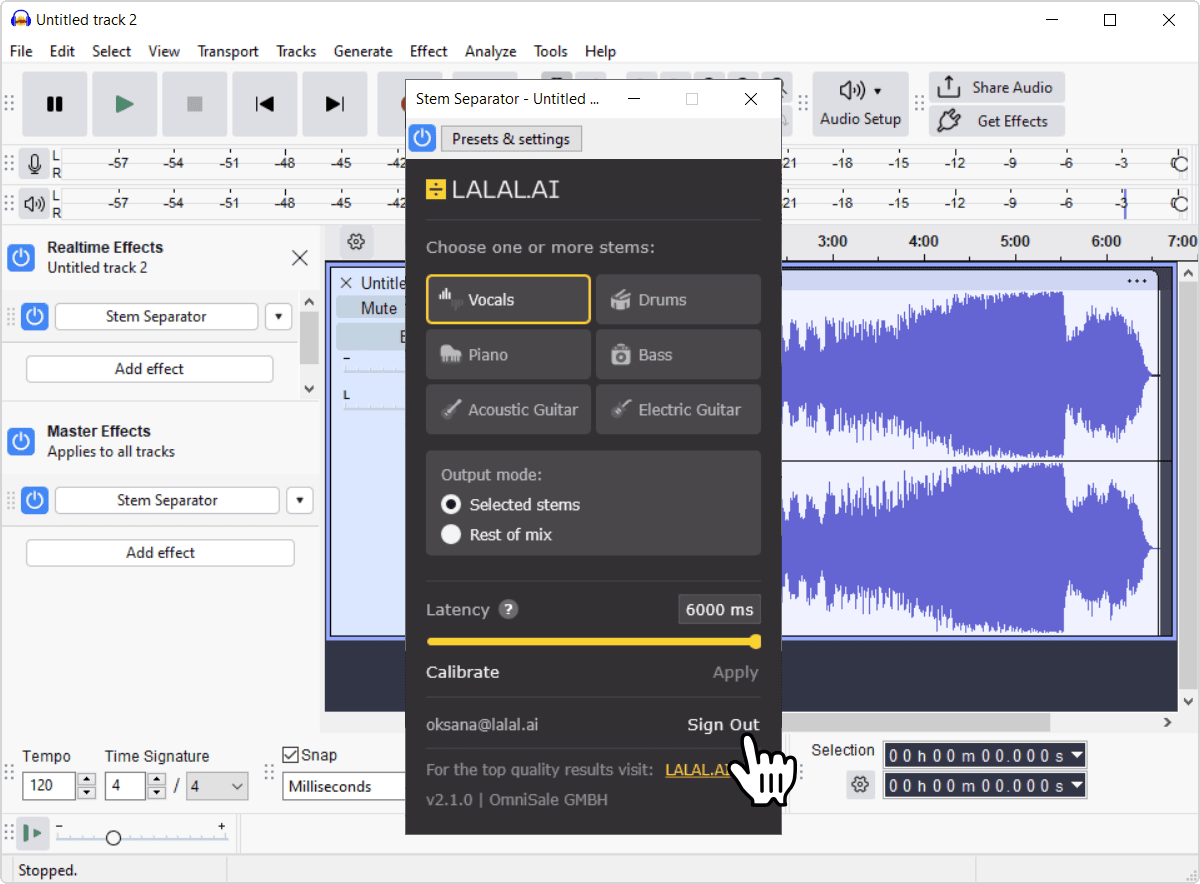
- If you’re moving to a new computer or want to start over, use Sign Out in the plugin’s footer to clear local activation and bring back the activation screen.
![Sign Out link in the plugin footer]()
Using the Plugin
The Basic Workflow (Real-Time)
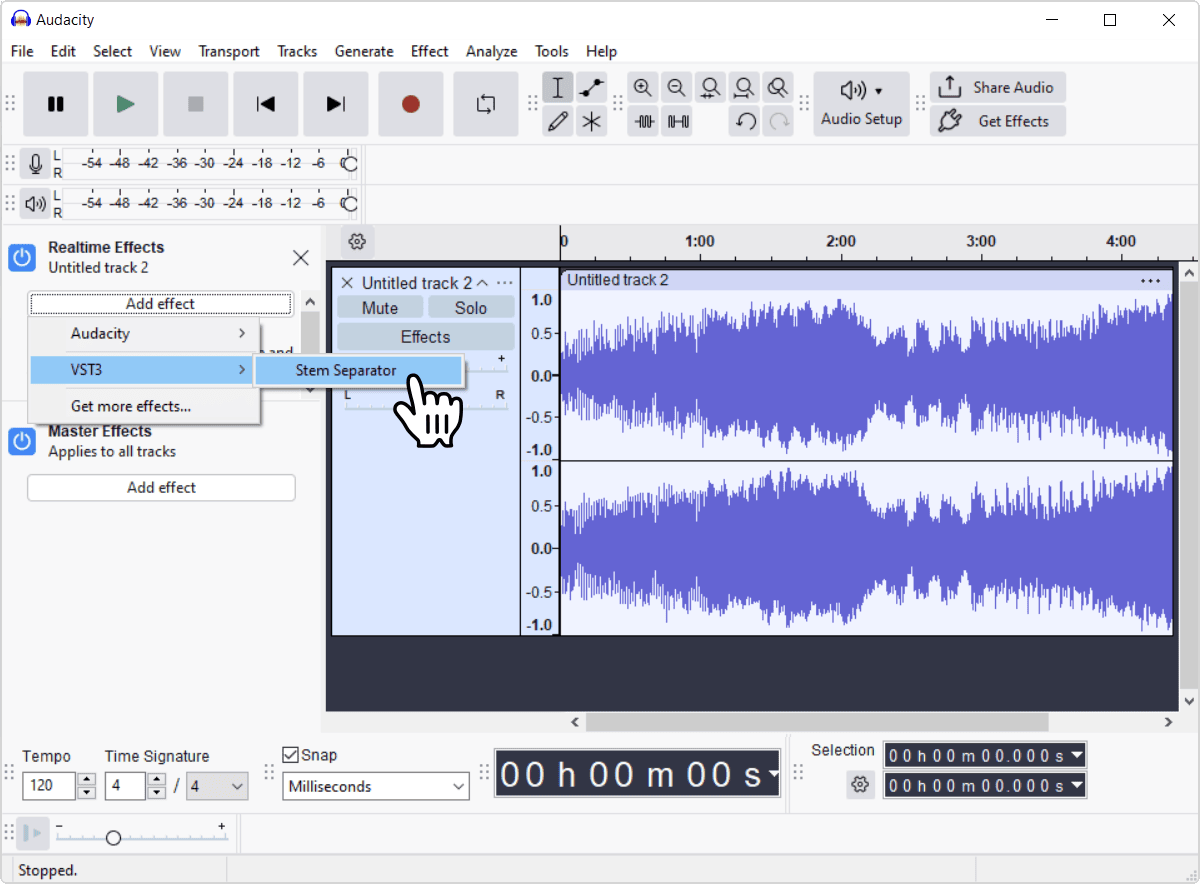
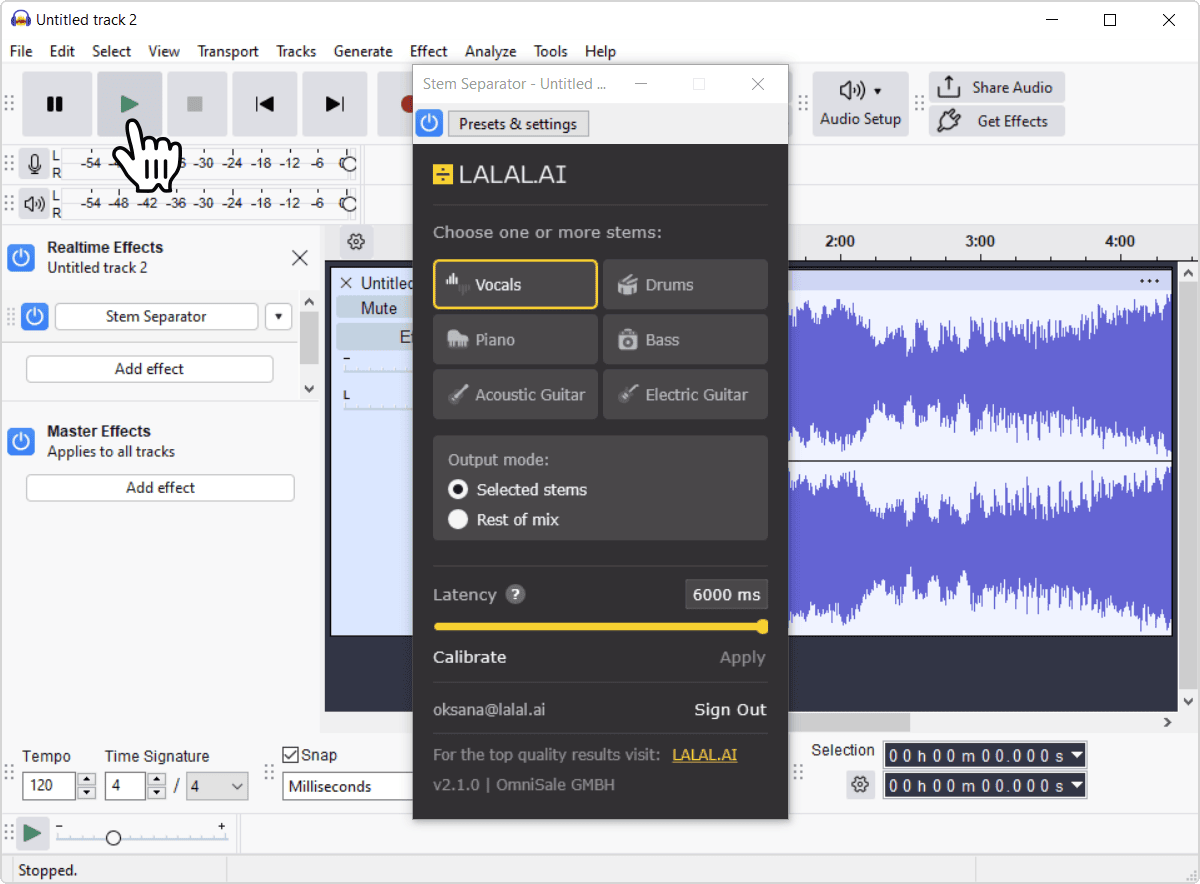
- Insert the plugin on a stereo track or bus. The plugin works on a stereo mix, so it needs to sit on a track or bus carrying stereo audio.
![Adding Stem Separator as a VST3 effect on a track]()
- Start playback. It gives you audio to work with as you turn on stems and adjust settings.
![Track playing back with the plugin active]()
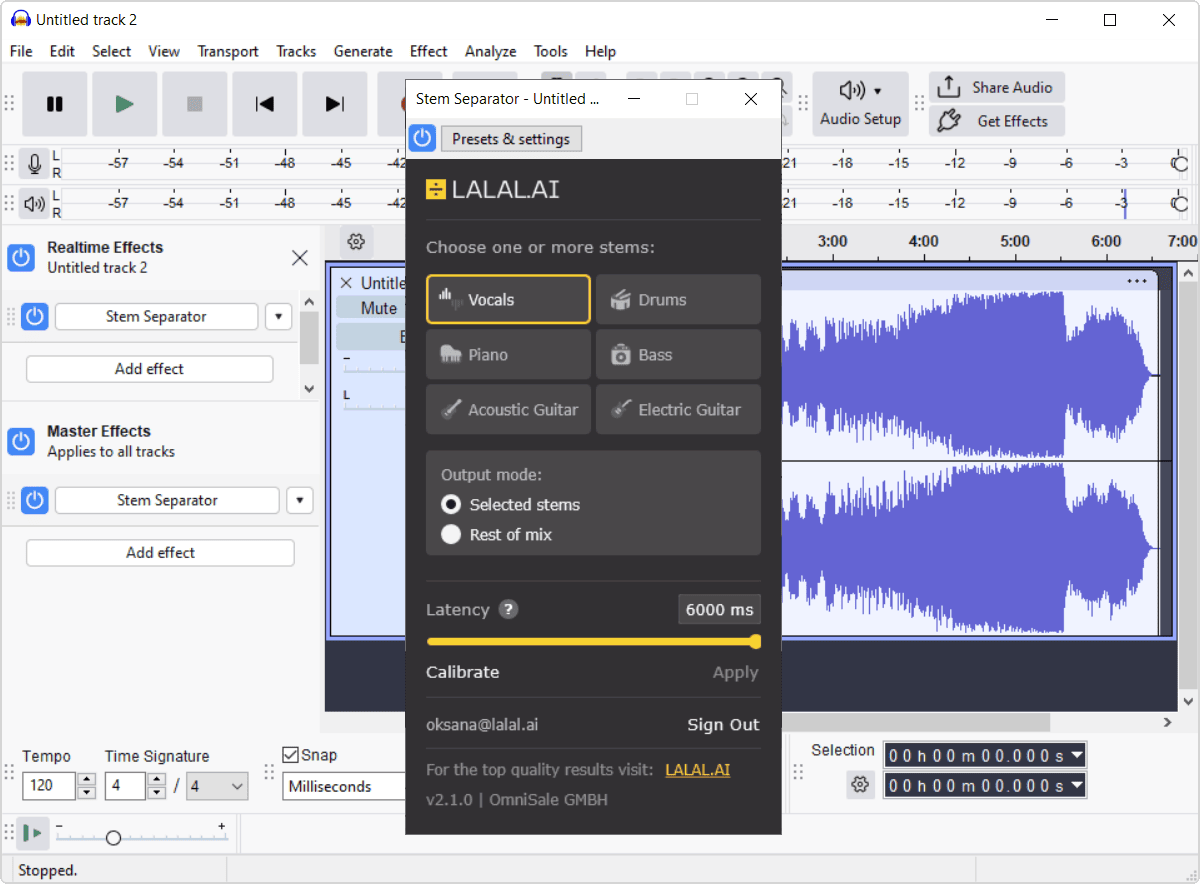
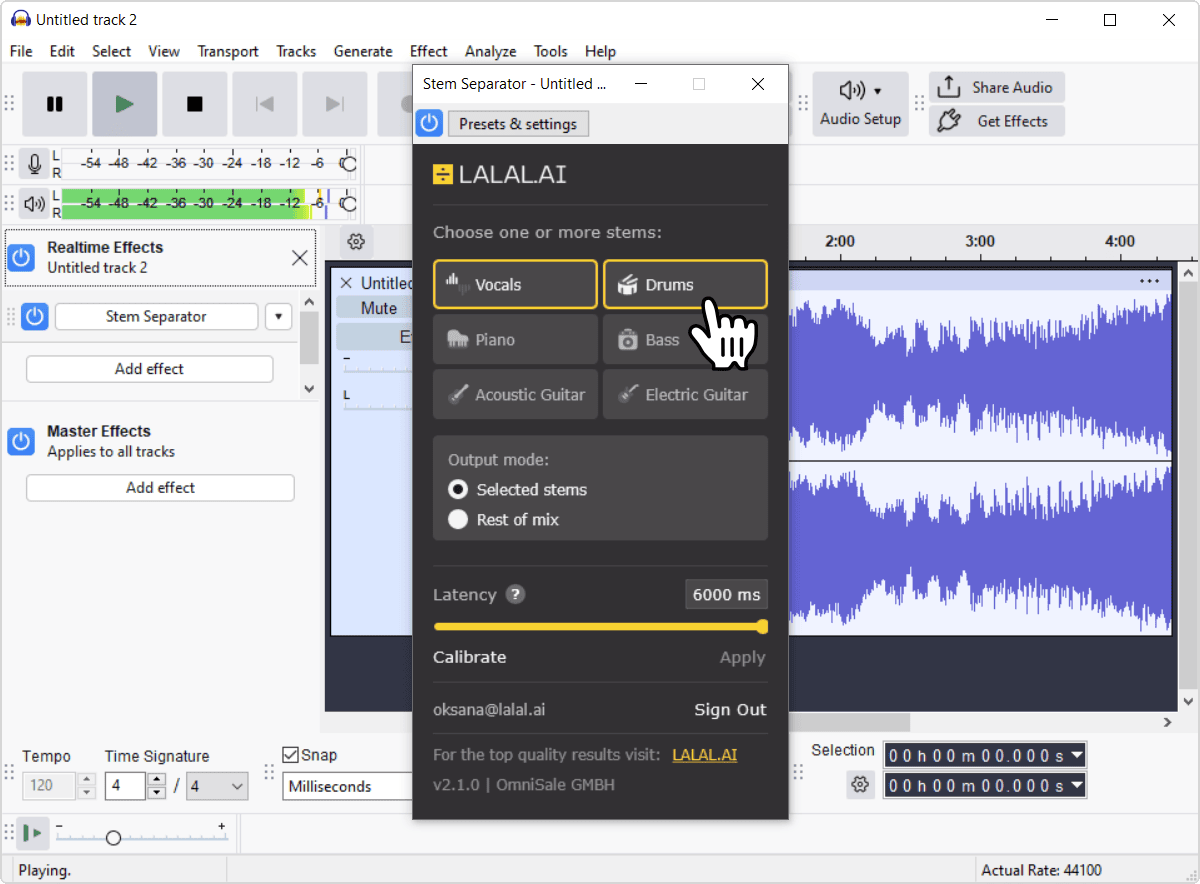
- Turn on the stems you want to work with. You can enable any combination of Vocals, Drums, Piano, Acoustic Guitar, Electric Guitar, and Bass at once.
![Stem buttons in the plugin with Vocals and Drums enabled]()
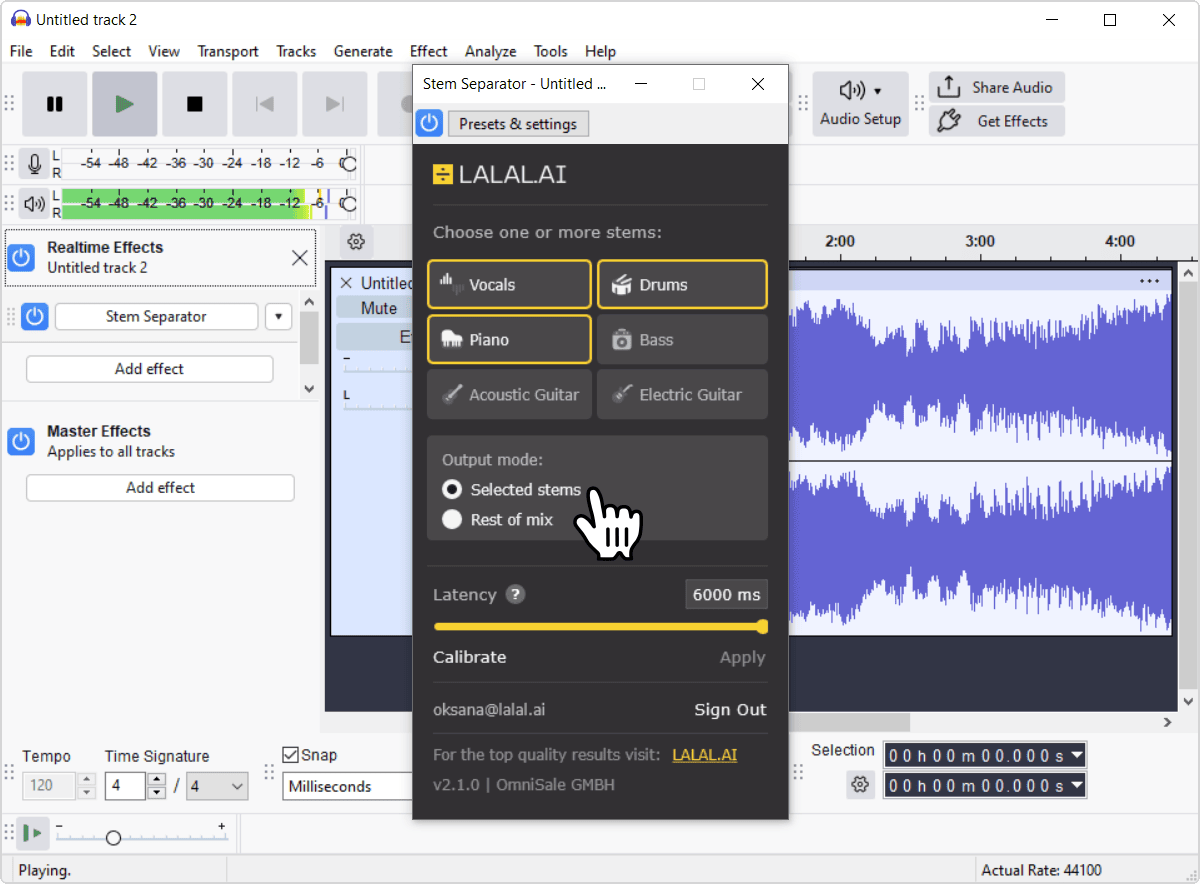
- Choose your Output Mode. Set it to Selected Stems to hear only what you turned on, or to Rest of Mix to hear everything else instead.
![Output mode options: Selected stems and Rest of mix]()
- Route to separate channels if needed. See below if you want individual stems on their own outputs rather than switching inside the plugin.
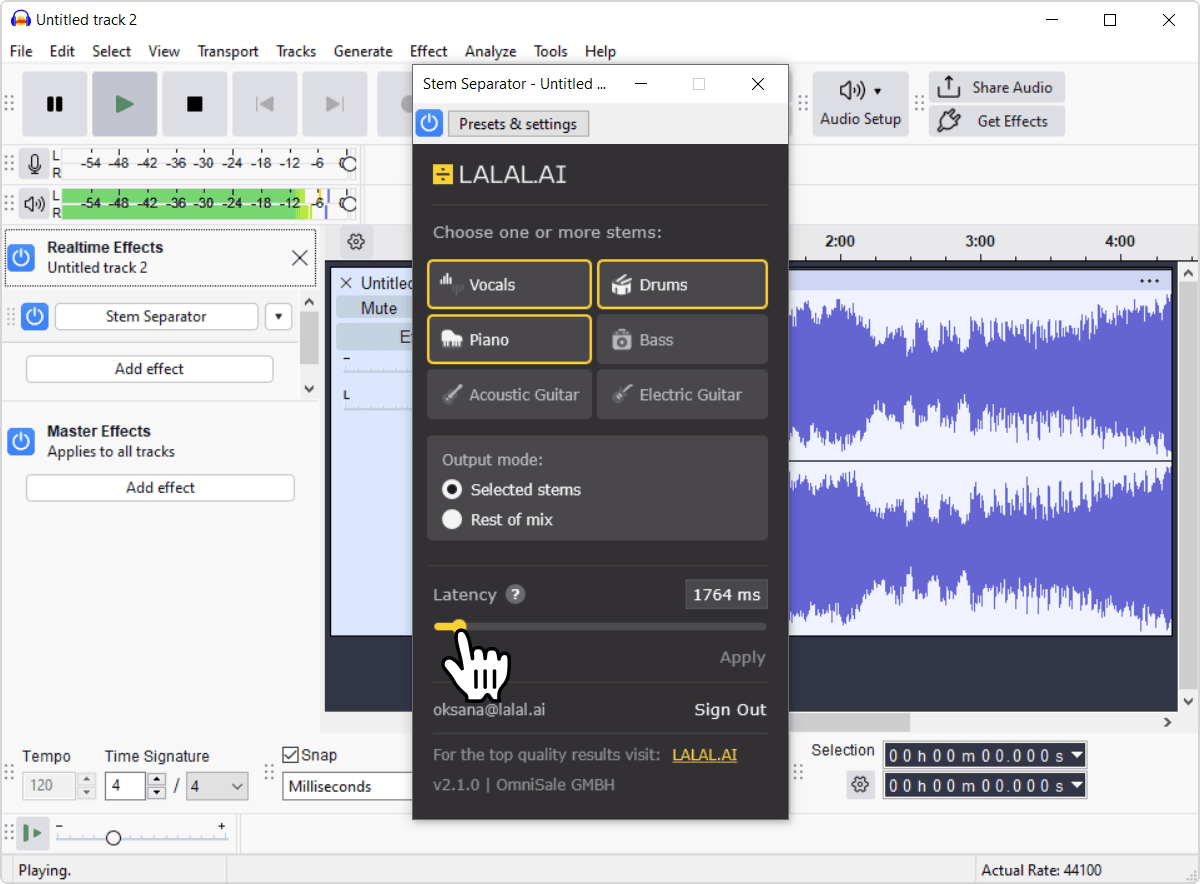
- Adjust latency if you run into performance issues. See below for how to balance responsiveness against stability.
![Latency slider and Calibrate control in the plugin]()
From here, you can adjust stems or Output Mode at any time and hear the change immediately. If you’d rather skip live monitoring and get straight to a finished file, see the Working Offline section below.
Sending Stems to Separate Channels
If you want to process or mix a stem on its own, rather than just monitor it inside the plugin, here’s how:
- Turn on the extra outputs for the plugin. It depends on your DAW; look for a way to add outputs to the plugin or track, sometimes labeled multi-output, plugin outputs, or similar.
- Set up a channel for each stem you want on its own. These are the mixer channels the plugin’s outputs will feed into.
- Route each plugin output to its matching channel. Connect the plugin’s output for a given stem, or the residual, to the channel you made for it.
- From there, treat each channel like any other track. Add plugins, adjust volume, or mix it in however you’d normally handle a track.
Note: This workflow isn’t available in Audacity. Its playback engine doesn’t support multi-channel or bus routing, so there’s no way to send individual plugin outputs to separate channels.
Working Offline
Skip live monitoring and let your DAW process the track in one pass:
- Insert the plugin and set it up as usual. Turn on the stems you want and choose your Output Mode, same as for real-time.
![Plugin set up on a track before rendering]()
- Render the track instead of pressing play. In your DAW, this is usually called Bounce, Render, Freeze, or Export.
![Exporting the processed track from the DAW]()
- Get your finished file. The DAW hands back the processed audio directly.
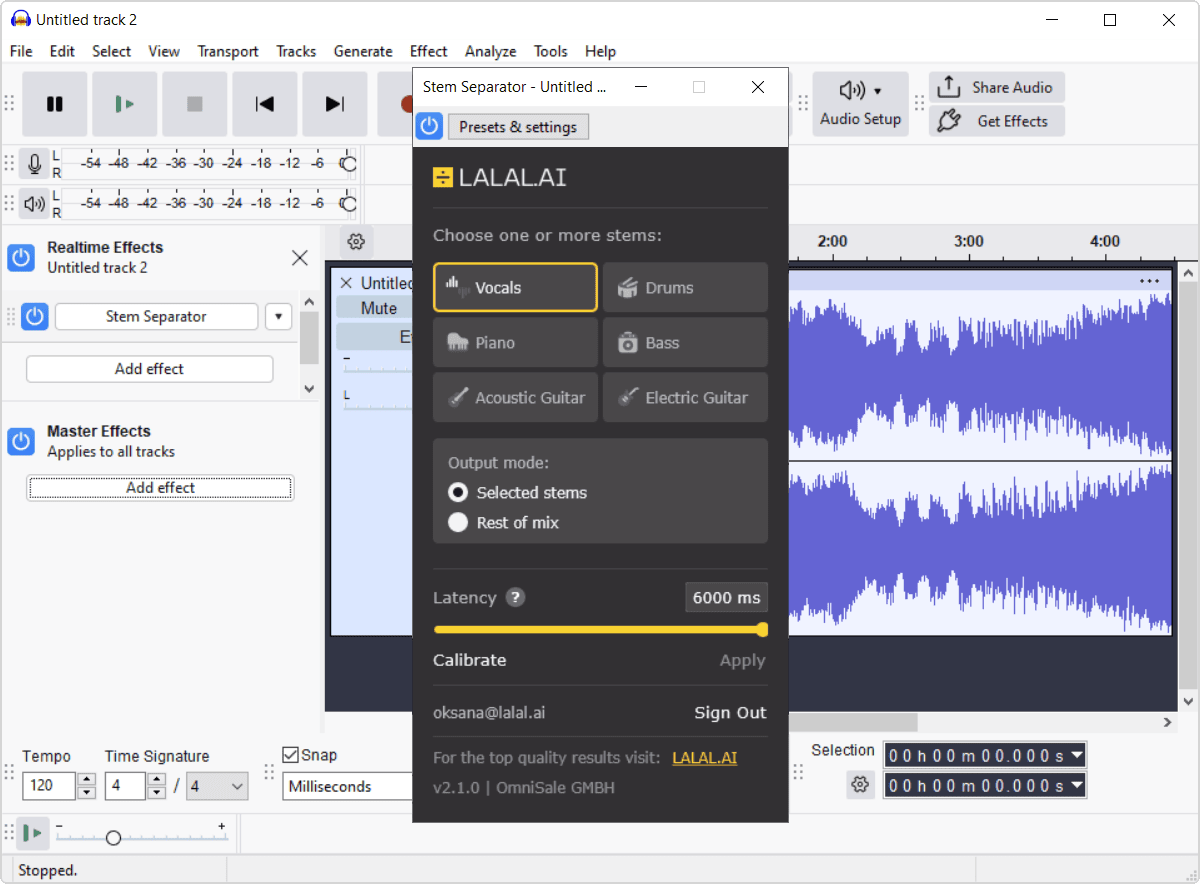
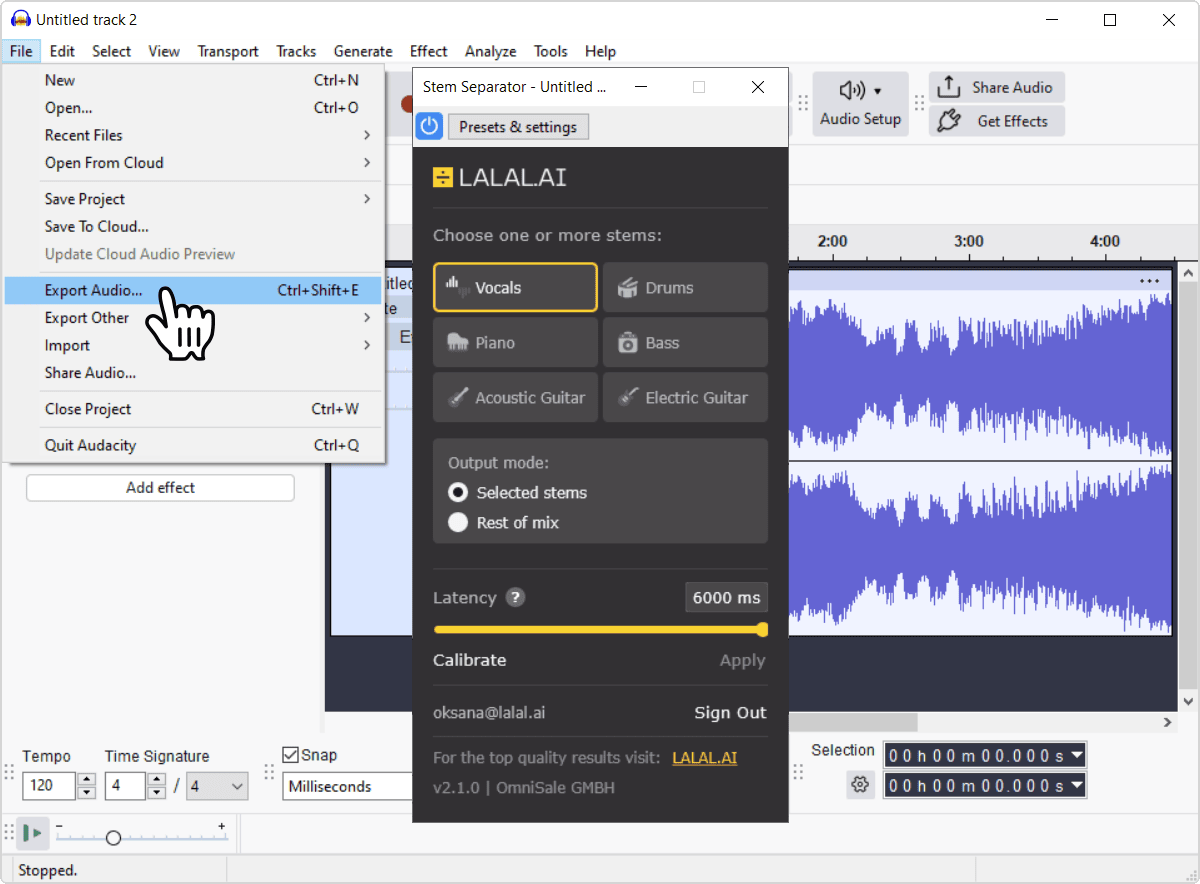
If you already know which stems you want, or real-time playback keeps stuttering, this gets you straight to a finished file without the live monitoring.
Latency in Practice
Latency trades responsiveness for stability: lower reacts faster but asks more of your processor, higher is gentler on your system but slower to respond. If you’d rather not dial it in yourself, click Calibrate to set a stable value for your system automatically, then nudge it up if you enable more stems afterward.
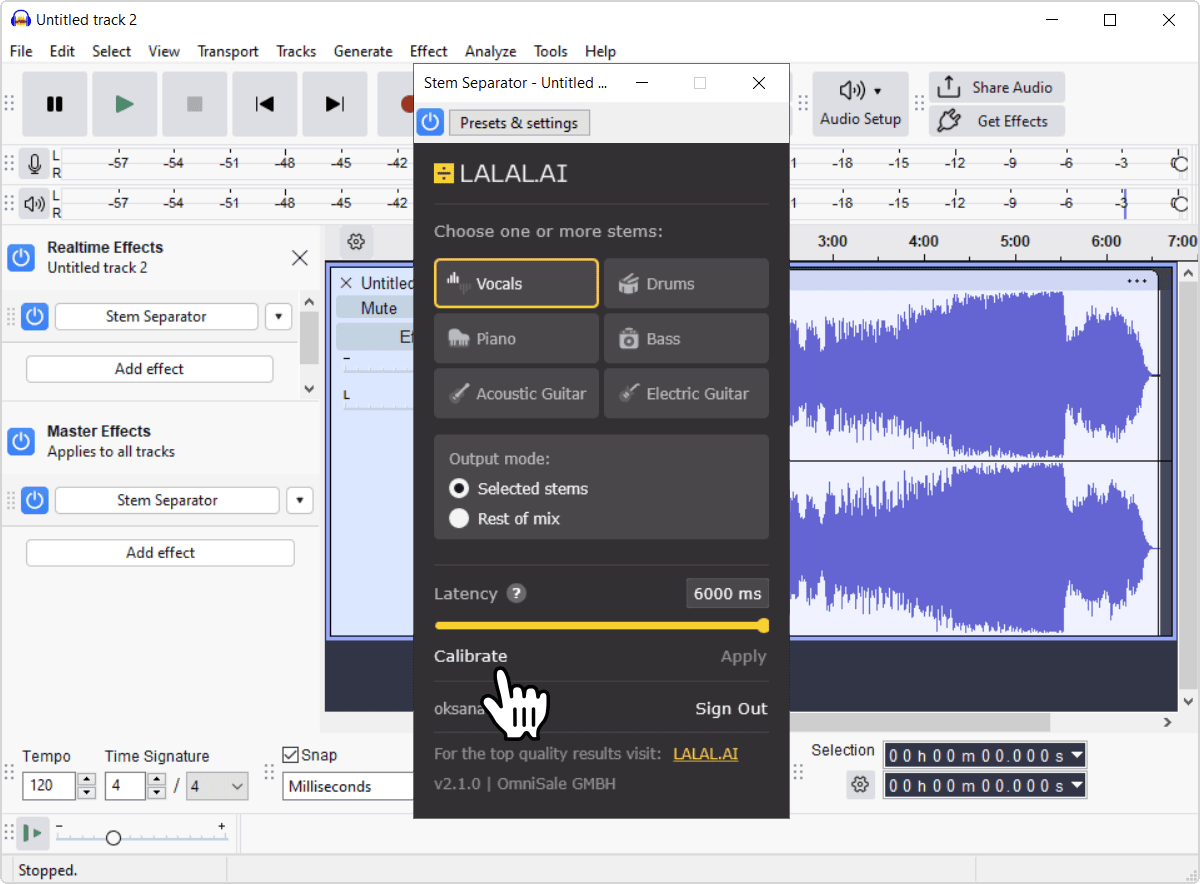
If you hear glitches or dropouts during playback, increase latency first, or click Calibrate. If that’s not enough, reduce your overall system load too, try a bigger DAW buffer size, or close a few other heavy plugins, then hit play again and see how it sounds.
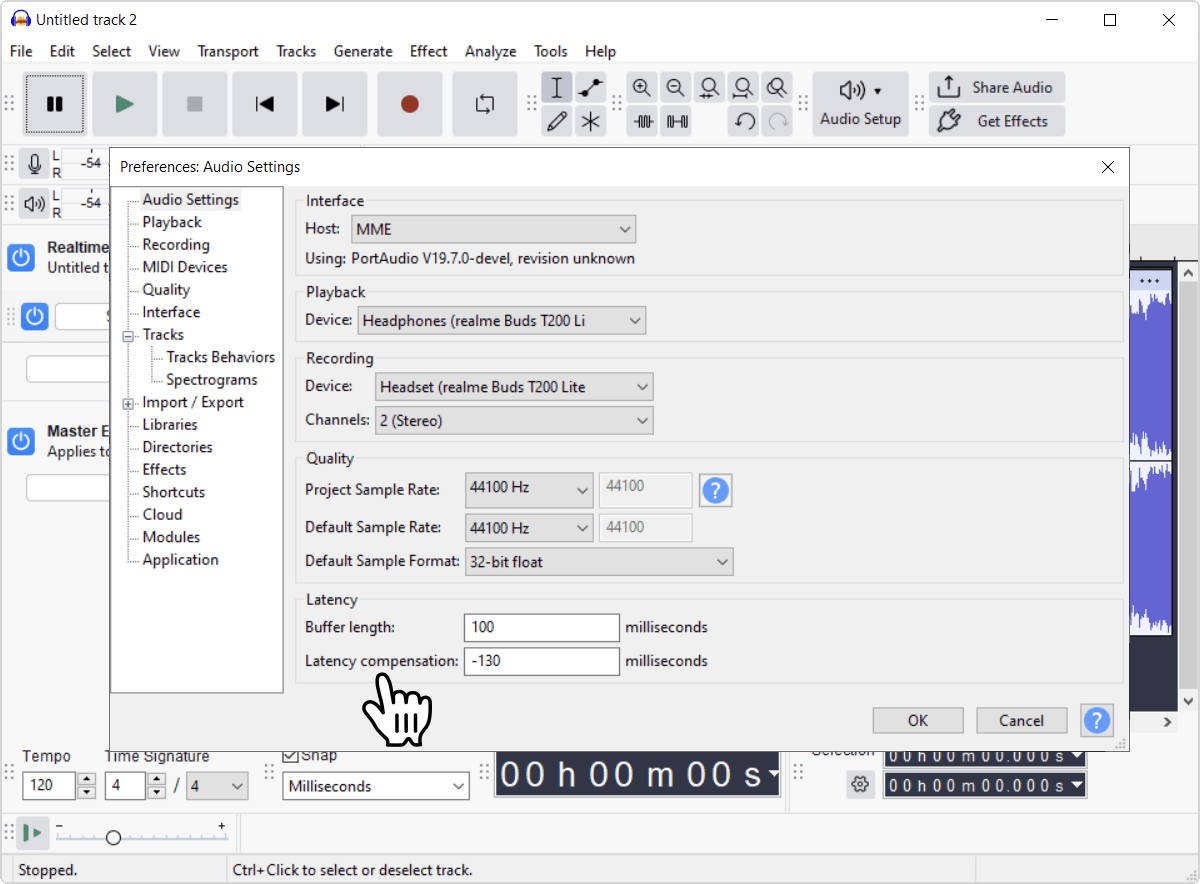
Moving the track to a Bounce or Render instead sidesteps the trade-off entirely, since offline processing isn’t racing playback and latency isn’t a factor there. You do lose live monitoring during that pass, though.
Tips for Getting the Best Results
- Use the highest-quality source audio you can. Lossless formats like WAV or AIFF give the plugin more to work with than a heavily compressed MP3. The cleaner the source, the cleaner the separation.
- Start with the latency set higher, then dial it down. Confirm your system keeps up before pushing for the fastest response, rather than starting on the lowest setting and troubleshooting glitches afterward.
- Match Output Mode to the job. Choose Selected Stems for isolating and focusing on one part, Rest of Mix for a backing track with certain instruments removed instead.
- Route stems you plan to process onto their own channel. Monitoring inside the plugin is fine for quick checks, but processing or mixing a stem properly calls for its own output.
- If your system is already working hard, lighten the load elsewhere. Freeze or render other heavy tracks and plugins in the same project. It frees up CPU and GPU power for the plugin to use instead.
- Keep your DAW up to date. Using the latest version of your DAW gives the plugin the best chance of running smoothly.
When you’re finalizing a mix rather than just drafting it, it’s worth running the stem through a cloud model on the web version (Andromeda or Perseus) instead of relying on the plugin alone. The cloud models are built for depth over speed, and tend to do noticeably better on complex material, final mixes, or anything headed for mastering. Everyday-separation work sounds fine straight out of the plugin, so this is really only worth the extra step once the stakes go up.
FAQ
Do I need a subscription to use the plugin?
Yes, an active Pro subscription is required. There’s no free version or trial.
Which DAWs does the plugin work with?
Any DAW that supports VST3, or AU on macOS, should work. It’s been tested directly in Ableton Live, Cockos REAPER, Steinberg Cubase, and VST3-enabled versions of Audacity.
Which format should I install, VST3 or AU?
On Windows and Linux, VST3 is the only option. On macOS, you can choose either; install whichever your DAW uses.
Is there a GUI installer for Linux?
No, there’s no installer wizard on Linux. Extract the archive and copy the .vst3 bundle into a VST3 folder yourself, as covered in the Installing the Plugin section above.
Why isn’t the plugin showing up in my DAW after I installed it?
First, make sure your DAW is updated to its latest version; older versions can have trouble picking up newly installed plugins. If that’s not it, confirm the install folder is in your DAW’s scan list, run a full rescan, and restart the DAW afterward. On Linux, also check the bundle’s permissions and the exact path you copied it to.
I never got my one-time activation code. What now?
Check your spam folder, confirm your email was typed correctly, and use the retry option on the code entry screen rather than restarting the whole activation process.
Does the plugin need an internet connection all the time?
Only for sending and verifying the one-time code initially, and for its periodic background refresh afterward. If that refresh fails because the saved activation looks invalid or expired, you’ll need to reactivate.
How do I move my activation to a different computer?
Use Sign Out in the plugin’s footer to clear activation on the old machine, then activate again on the new one with the same account email.
How do I get an instrumental stem if there’s no dedicated control for it?
Turn on only Vocals, then set Output Mode to Rest of Mix. The residual, everything except the vocal, is a full instrumental.
How does the plugin compare to the web version’s quality?
The plugin runs on Lyra, built for speed and local processing rather than the best possible quality. Everyday-separation work holds up well, but for final mixes, mastering, or complex material, using a cloud model on the web version of LALAL.AI is recommended.
What’s the difference between real-time and offline processing?
Real-time is what runs while you’re playing the track live and switching stems as you listen, and it’s why the Latency and Calibrate settings exist. Offline is what runs when your DAW bounces, renders, freezes, or exports instead of playing back, so there’s no live playback to keep up with. You don’t choose between real-time and offline yourself; your DAW decides based on which you’re doing.
Why am I getting crackling, dropouts, or an Overload Warning?
Increase latency first, that’s usually enough. If it’s still not, ease up on your system’s overall load too, try a bigger DAW buffer or close a few other heavy plugins, then check again after resuming playback.
