How to Digitize and Clean Up Old Cassette Recordings
Learn how to convert tapes into digital files, restore their sound and remove background noise using LALAL.AI and other tools.

Back in the day, analog recorders and players were the only way we could watch movies, listen to music and capture our life. The times have dramatically changed – thanks to rapid technological advances we now can create and store songs and other audio materials without quality degradation over time.
But can we bring the condition of tape recordings to the level of the digital audio of today? This is one of the most popular questions we receive from LALAL.AI users. Many of them have old tapes dear to their heart, for example, a cassette recording of grandparents singing and playing piano together. Such recordings can never be perfect in quality but you can still improve them – reduce noise, amplify voice/vocals and clean up the sound in general.
Let’s go over the process of restoration of old recordings from digitization to sound repairing.
Digital Enablement
Digital enablement, more widely known as digitization, is a conversion of information from analog to digital form. This process is required to turn tape recordings into files that you can play and manipulate on your computer. There are two ways you can make it happen – with the help of a USB cassette converter and an old tape deck.
How to Digitize Tapes with a USB Converter
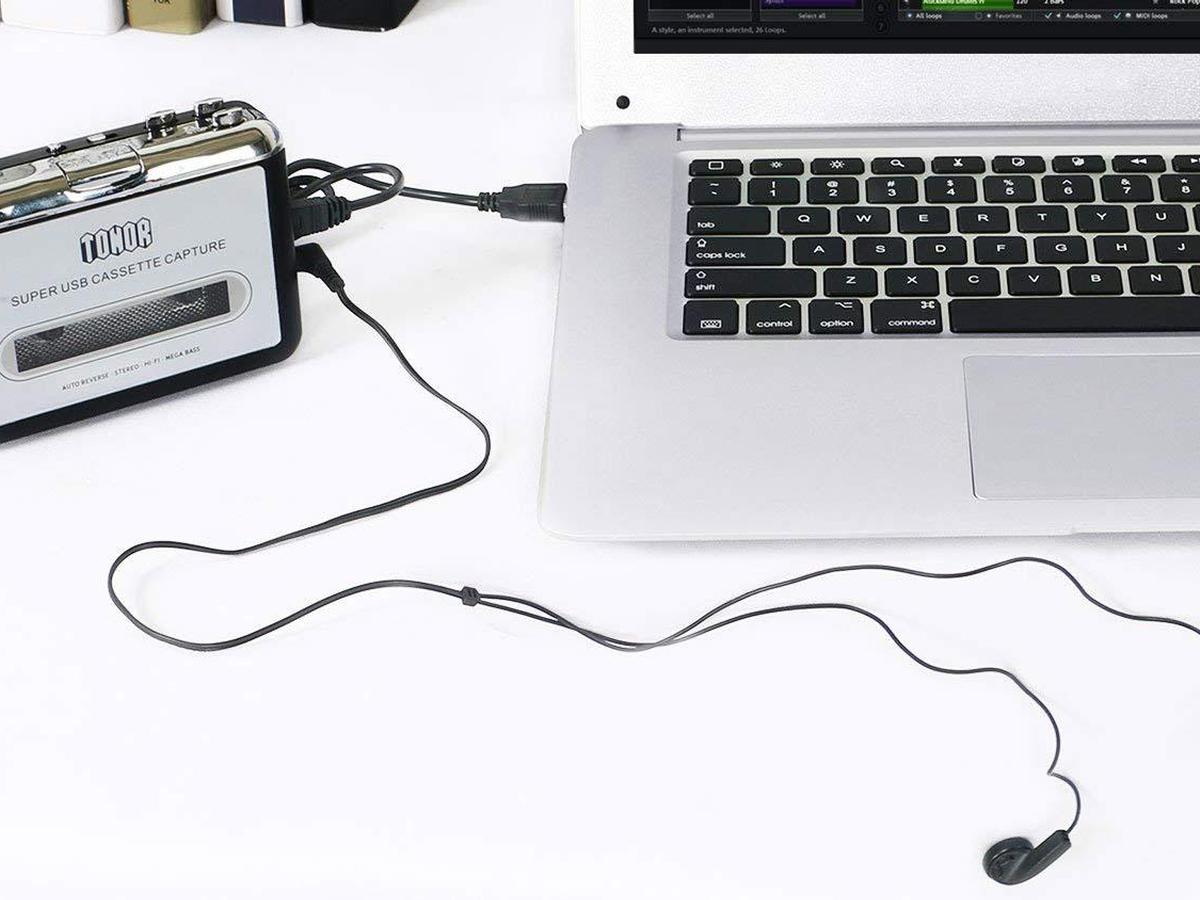
It’s the cheapest and easiest way to convert tape recordings into digital files. If you don’t want to deal with cables and unfamiliar software, this is the way for you.
- Buy a USB cassette converter. There are a lot of options on Amazon and other sites that average from $15 to $50. Reshow and Dansrueus are especially popular due to the ability to convert tapes to raw MP3 files.
- Download the accompanying software. USB cassette converters come with specialized software that you can get either from a disc or the manufacturer’s website.
- Follow the instructions. They come in physical format along with the converter and are also available on the manufacturer’s website. They describe how to put a tape in the converter, connect it to your computer and go about the conversion process.
How to Digitize Tapes with a Tape Deck
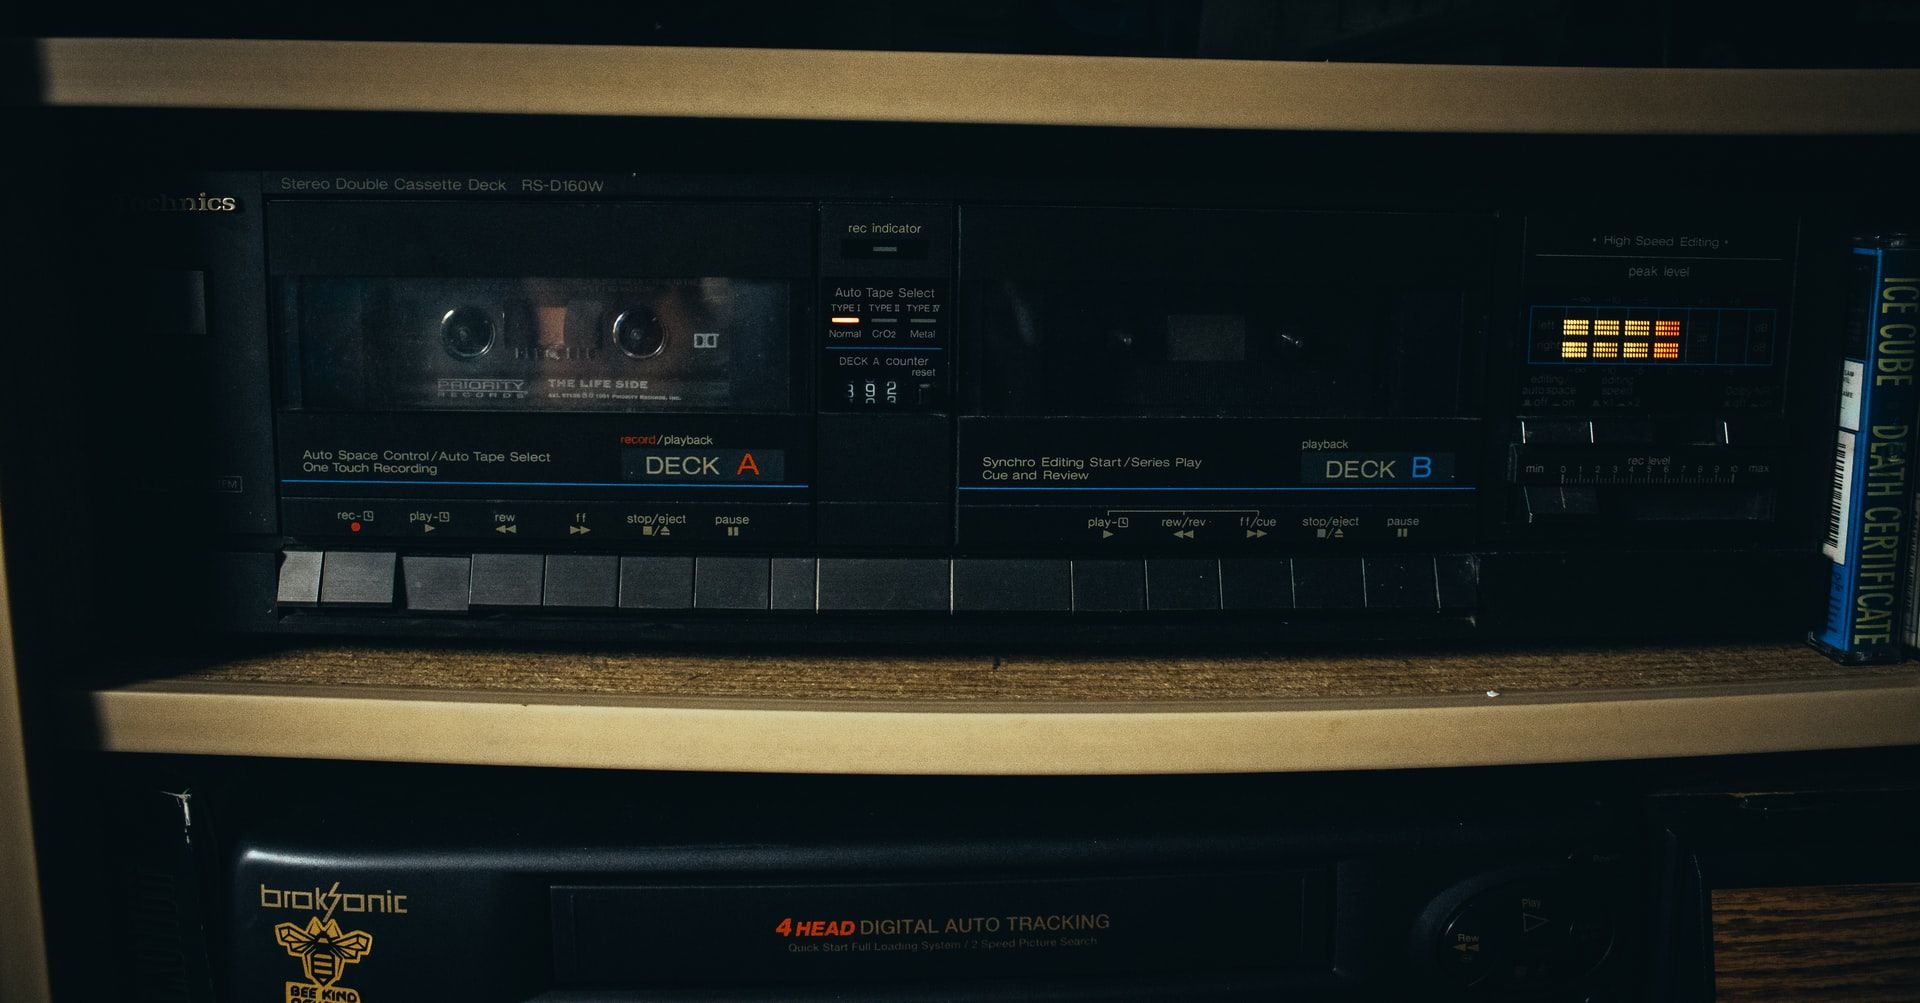
Conversion with a USB cassette player yields pretty high-quality results but a tape deck provides even better quality. However, this process is harder and more time-consuming than working with a cassette converter.
- Test your tape deck. Play a tape you don’t care about to make sure the deck works. Pay attention to issues like excess hissing, warbling noises and strange playback speeds. If you notice any of these issues or the tape gets eaten, the deck is not suitable for conversion. Ask around to borrow another tape deck or buy one. Don’t use the one that doesn’t pass the test, otherwise, you will get subpar results and likely ruin the original recording for good.
- Adjust the cassette bias. Each tape will say either “high bias” or “normal bias.” Use the bias knob or button on the deck to set the bias that matches the specific cassette. If there is an option on the deck to match your tape with the metal or chrome cassette types, use it. Some decks have no bias knobs – it’s either because they have an automatic adjustment or the models are simply too old. In this case, you can test a sample track to ensure you will be happy with the audio quality.
- Connect the tape deck to your computer. There are a lot of different decks, so you have to find get a cable that fits your deck. For the majority of decks, you can use a male-to-male 3.5mm cable to connect the deck’s headphone output to the computer’s microphone output. If your tape deck’s headphone port isn’t 3.5mm, use an RCA to 3.5mm cable or a 1/4 inch to 3.5mm cable instead. There is also a chance that your computer doesn’t have a 3.5mm microphone input – don’t fret, plug a cheap audio capture card into the USB port and add microphone functionality.
- Transfer recordings to audio editor. Load the cassette’s content to an audio editing application of your choice. Many people prefer Audacity since it’s free, fairly easy to use and great for analog-to-digital audio conversion. There you can cut the recording into several tracks, adjust volume and use other features to improve the sound.
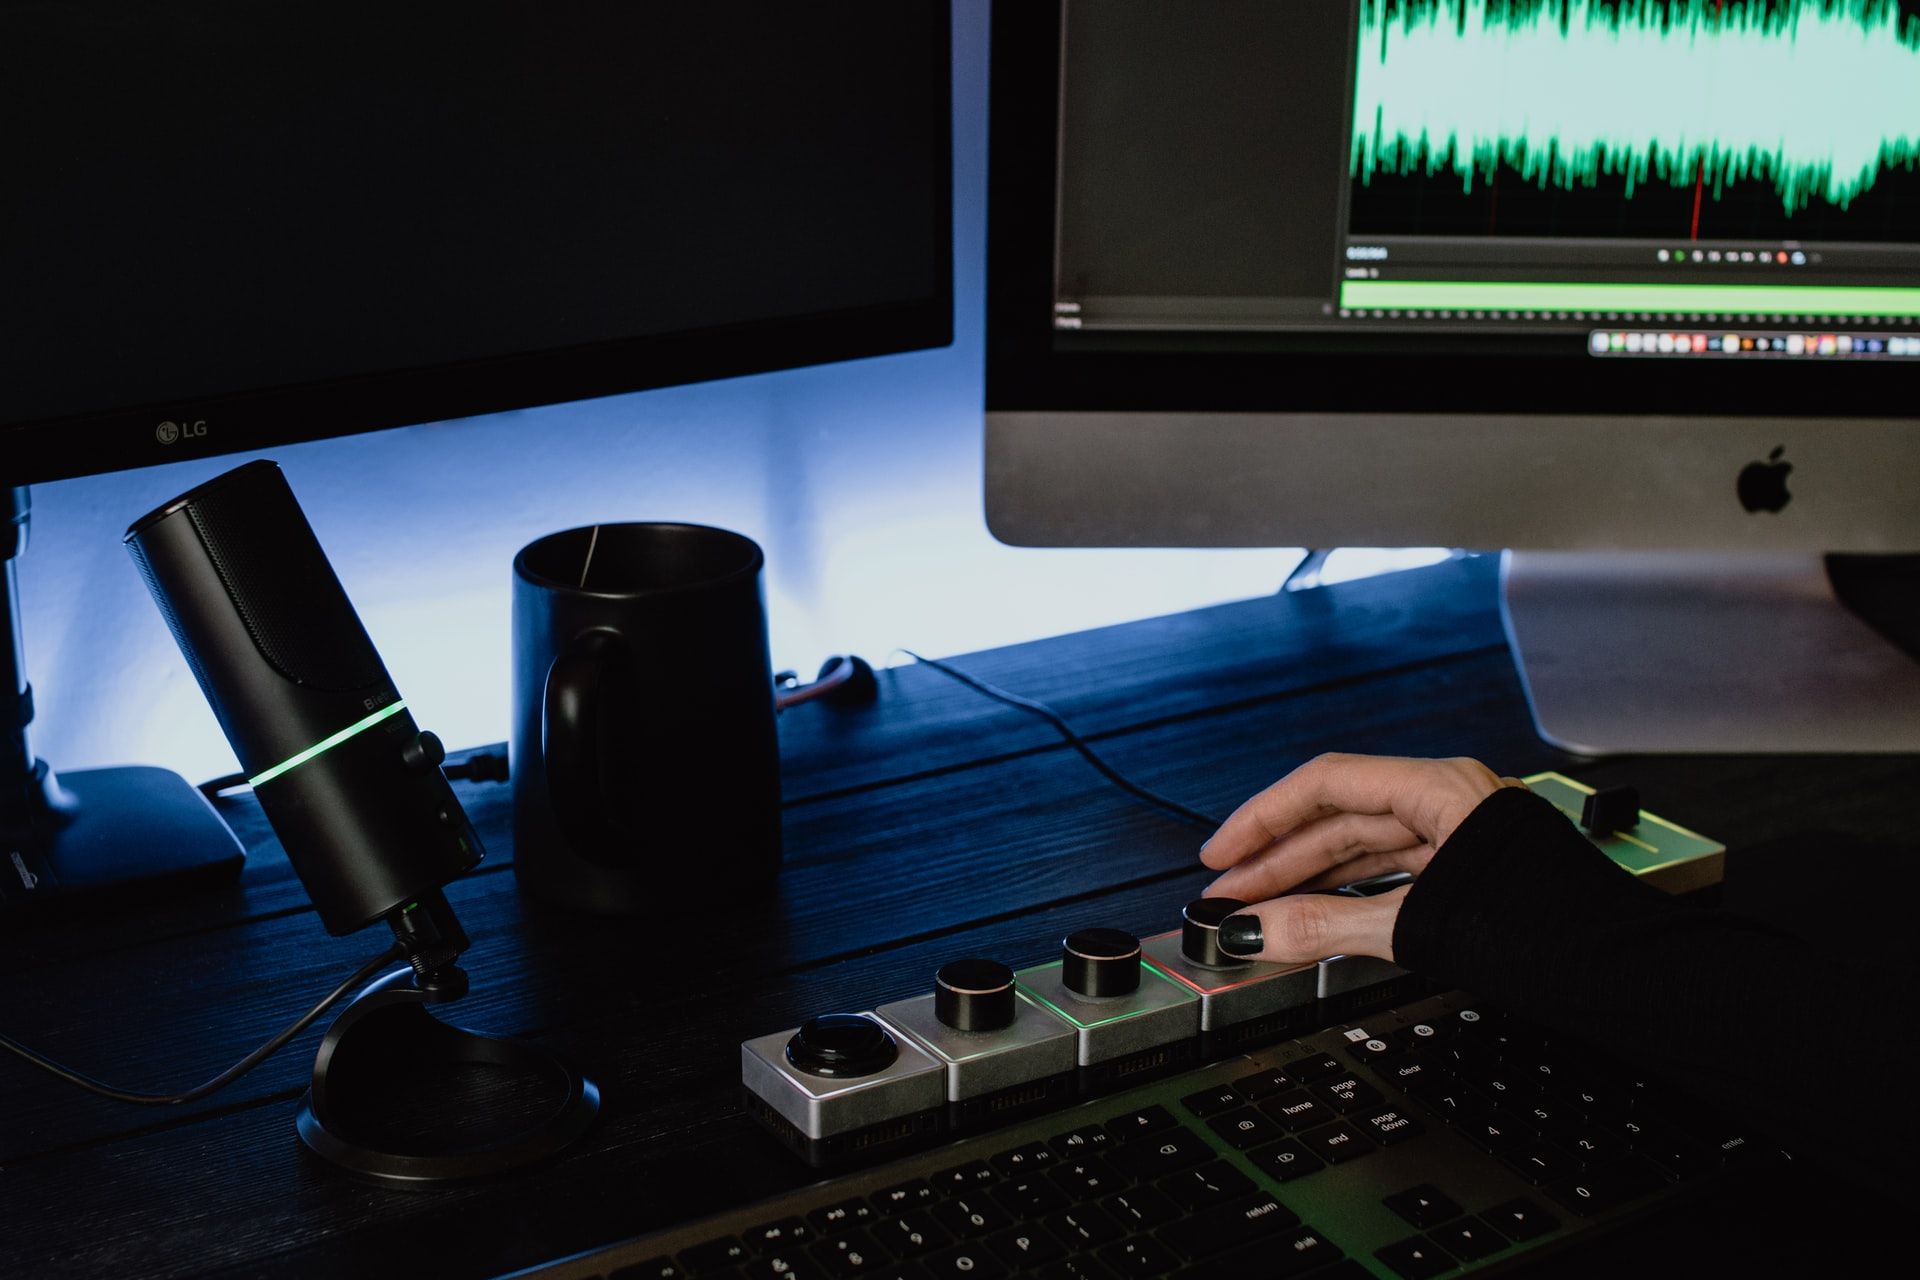
Noise Reduction
Once your recordings are digitized, it’s time to polish them. You can get rid of hiss to some degree with the help of Audacity but for more pristine sound use LALAL.AI. Its next-generation AI-powered technology is capable of detecting the sound of voice, vocals and instruments, precisely separating them from background noise, and producing clean results.
How to Reduce Noise in an Old Tape Recording
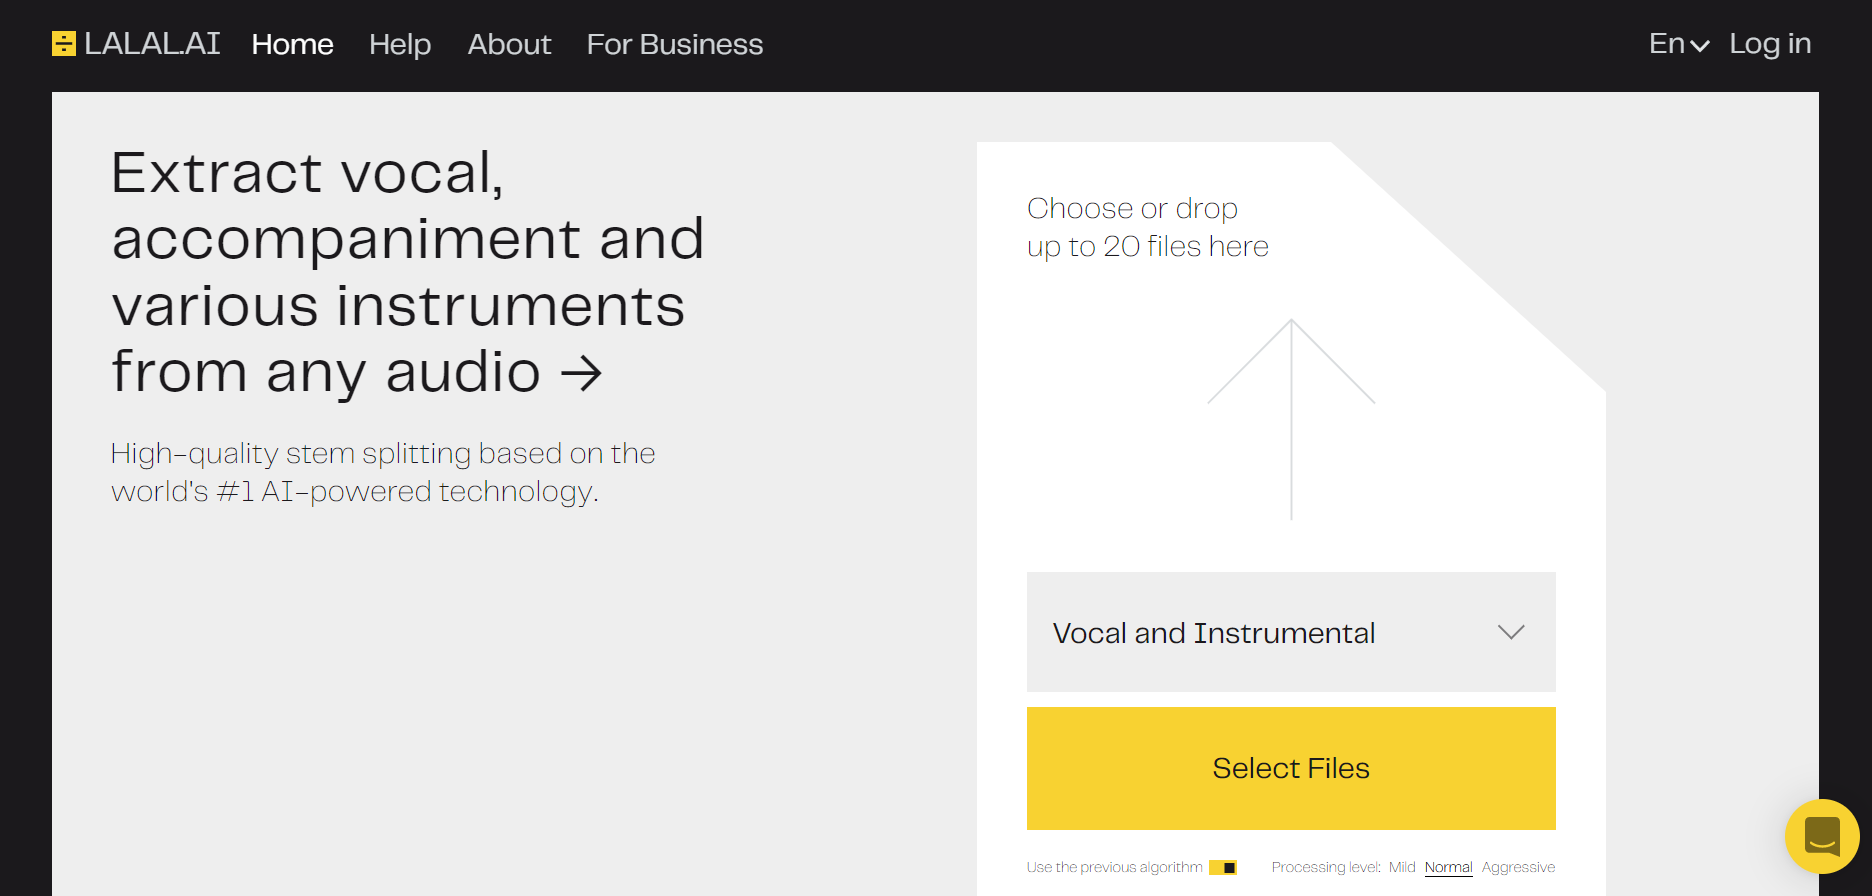
- Open LALAL.AI in your browser.
- Upload the recording you want to clean up.
- Wait a few seconds until the processing is complete.
- Listen to the preview. If you want to adjust the processing level, click ‘← Back’, select either Mild or Aggressive level under the Select Files button and upload your file again.
- Once you’re satisfied with the result, sign up and click Process the Entire File.
- Click the download icon (⤓) to save the cleaned-up recording to your device. It will be downloaded in the same format as the original file and without quality loss.
Restoration and Amplification
After converting your treasured recordings to digital format and cleaning them up, there is still work to be done to address imperfections and enhance the sound.
Every tape recording comes with its own set of challenges, so we recommend using a few different tools because they work differently and the results they produce also depend on the characteristics of the original audio.
Below you can find the best applications for audio restoration and select the ones you like the most.
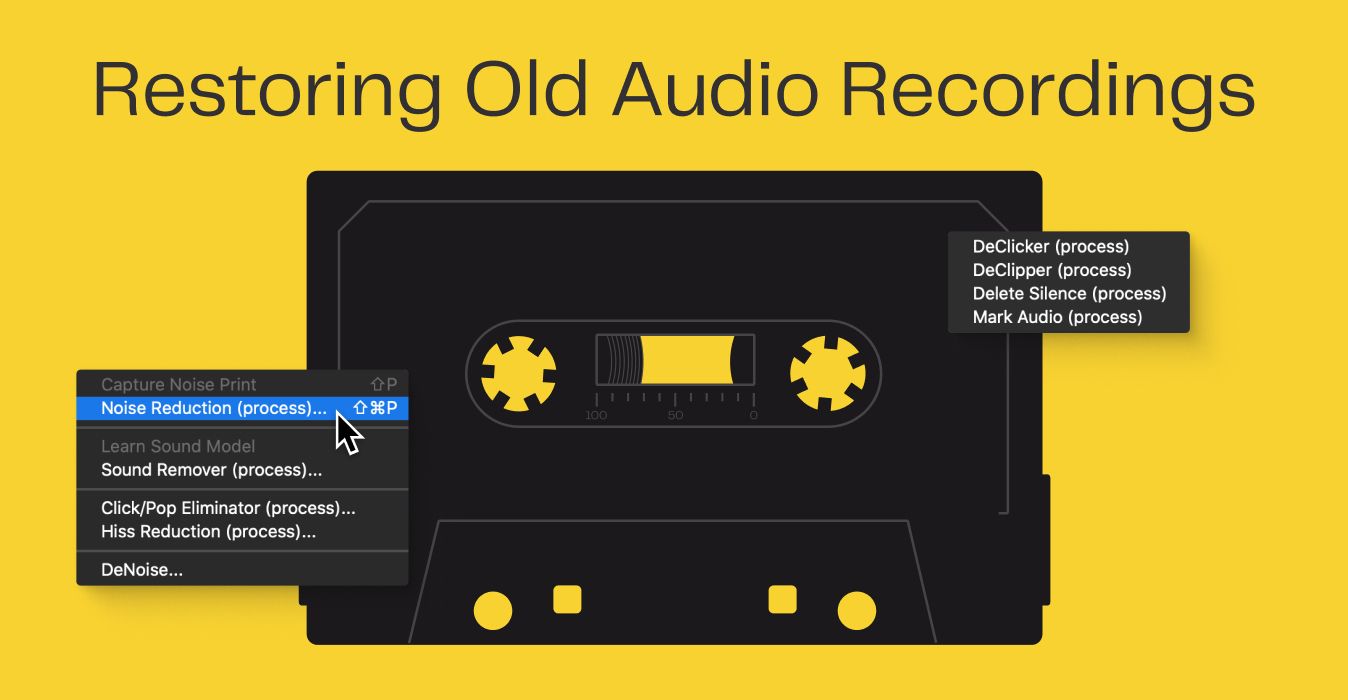
iZotope RX is an industry-standard audio restoration software trusted by professionals around the world. Built on years of extensive research in digital signal processing and machine learning, iZotope uses state-of-the-art technologies to provide a powerful feature set and top-notch results. De-hum, de-click, de-clip, de-rustle, music rebalance, dialogue contour, pitch correction, AI-based repair assistant that analyzes audio and suggests what to edit, plus spectral recovery which restores lost frequencies.
Sonnox Restore Bundle is a suite of three plug-ins designed for highly accurate audio restoration: DeNoiser, DeBuzzer and DeClicker. Their intuitive interfaces are easy to navigate and operate. DeClicker enables you to retain the audio parts you want, DeBuzzer tracks wandering fundamental frequencies in real-time and removes buzz, hum, whine and whistles, while DeClicker accurately removes pops, clicks and crackle sound from your recording.
Acon Digital Restoration Suite is a bundle of four cutting-edge plug-ins for audio restoration: DeNoise, DeHum, DeClick and DeClip. DeNoise performs adaptive noise reduction that gets rid of broadband, hiss and wind, while DeHum deals with tonal noises and complex buzzing. DeClip and DeClip restore audio that was damaged by clipping, as well as remove clicks and crackles. All four plug-ins are really fast and easy to use.
Accusonus ERA Range is a set of tools for audio repair, optimization and enhancement. They include such handy features as noise removal, voice deepening, mouth de-clicker, voice auto EQing, voice leveling, reverb removal, de-esser, de-clipper and many other functions. These plug-ins come with an audio clean-up assistant that helps you work smarter and faster, offers presets for quick start-up, and builds the chain of repair actions you perform so that you can continue your audio repair without having to start from scratch every time you run the tools.
CEDAR Studio is a range of AAX, VST2, VST3 and AU plug-ins that also come as a standalone version. It eliminates lots of common issues and helps to dramatically improve the sound quality of your audio recording. CEDAR removes electrical interference and handles poor acoustics with ease. It can identify all manner of sounds that you can manipulate with a variety of processing tools. Complex and otherwise intractable audio problems are marked on a spectrogram, helping you to address them right on the spot and get your audio recording repaired in no time.
Good luck with restoration of your old audio recordings!
Follow LALAL.AI on Twitter, TikTok, Instagram, Facebook, YouTube, and Reddit.